
Draw With Your Face With Janine Antoni

Make a one-of-a-kind casted self-portrait inspired by Janine Antoni, using dough as a mold for melted crayons. Then use your crayon self-portrait to draw!
Time: 45 minutes+
Grade Level: 3–5; adaptable for younger and older students
Art Speak: process, sculpture, self-portrait
DCPS Arts Curricula: perceiving
LOOK CLOSELY

Janine Antoni, Lick and Lather, 1993–1994. One licked chocolate self-portrait bust and one washed soap self-portrait bust on pedestals
Choose one sculpture to look at first, carefully viewing its colors and textures. What does the color remind you of? What do you think the sculpture would feel like? How would it smell or taste? Where do you see bumpy and smooth spots? Now look at the second sculpture. In what ways are the sculptures similar? How are they different? One difference is the color of the sculptures: one is brown and one is white.
You might notice that these two sculptures look a lot alike—that’s because they’re based on the same person! These artworks are self-portraits, meaning the artist created images of herself.
These sculptures are made from different materials. The artist, Janine Antoni, often uses materials that you might find in your home or at a grocery store. What two materials do you think the artist made these sculptures from? What makes you say that?
Antoni made Lick and Lather for the 1993 Venice Biennale, an art exhibition in Venice, Italy. She was inspired by Ancient Roman sculptures she saw there. Ancient Romans made extremely realistic sculptures of humans from stone. Antoni wanted to create realistic sculptures not from stone, but from common materials, like soap and chocolate.
She used a process called casting. First she made a mold directly from her body by holding her breath and submerging her head, hair, and shoulders into alginate—a material dentists use to make molds of teeth—for one minute. Next she melted 35 pounds of chocolate (!) and poured it into the mold. After she took her chocolate sculpture out of its mold, she “resculpted” the self-portrait by licking it! How do you think it would feel to lick your own face? Why?
Antoni also cast herself in soap using the same process. Instead of licking her soap self-portrait, Antoni spent a few hours with it in the bathtub. She slowly washed the sculpture with her hands, changing its appearance. Licking and washing are actions that are loving, but by licking and washing her likeness, Antoni started to slowly erase herself. In an interview, Antoni explained how Lick and Lather is “about conflict, the love/hate relationship we have with our physical appearance.” How do you think it would feel to wash your own face? Why?
GET TO KNOW JANINE ANTONI

Janine Antoni (b. 1964) is a Bahamian artist who uses her body as a tool to create sculpture and performance. She often uses unique materials, like chocolate, soap, and make-up. Antoni is not afraid to get messy when making art! She’s used her long brown hair to paint sweeping swirls on gallery floors, and her eyelashes to draw “butterfly kisses” (in which one person flutters their eyelashes against another’s skin) on paper. To sculpt, she uses her mouth to gnaw, bite, and lick sculptures of lard (animal fat) and chocolate.
Antoni’s artwork is influenced by gender roles. Gender roles are the ideas and expectations that people should behave in certain ways because of their gender.
Want to learn more? Read about Janine Antoni’s life and work.
MAKE IT!
For Lick and Lather, Janine Antoni made self-portraits from soap and chocolate by melting them down and pouring them into a mold made from her head. For this project, you will make a self-portrait from melted wax poured into a dough mold!
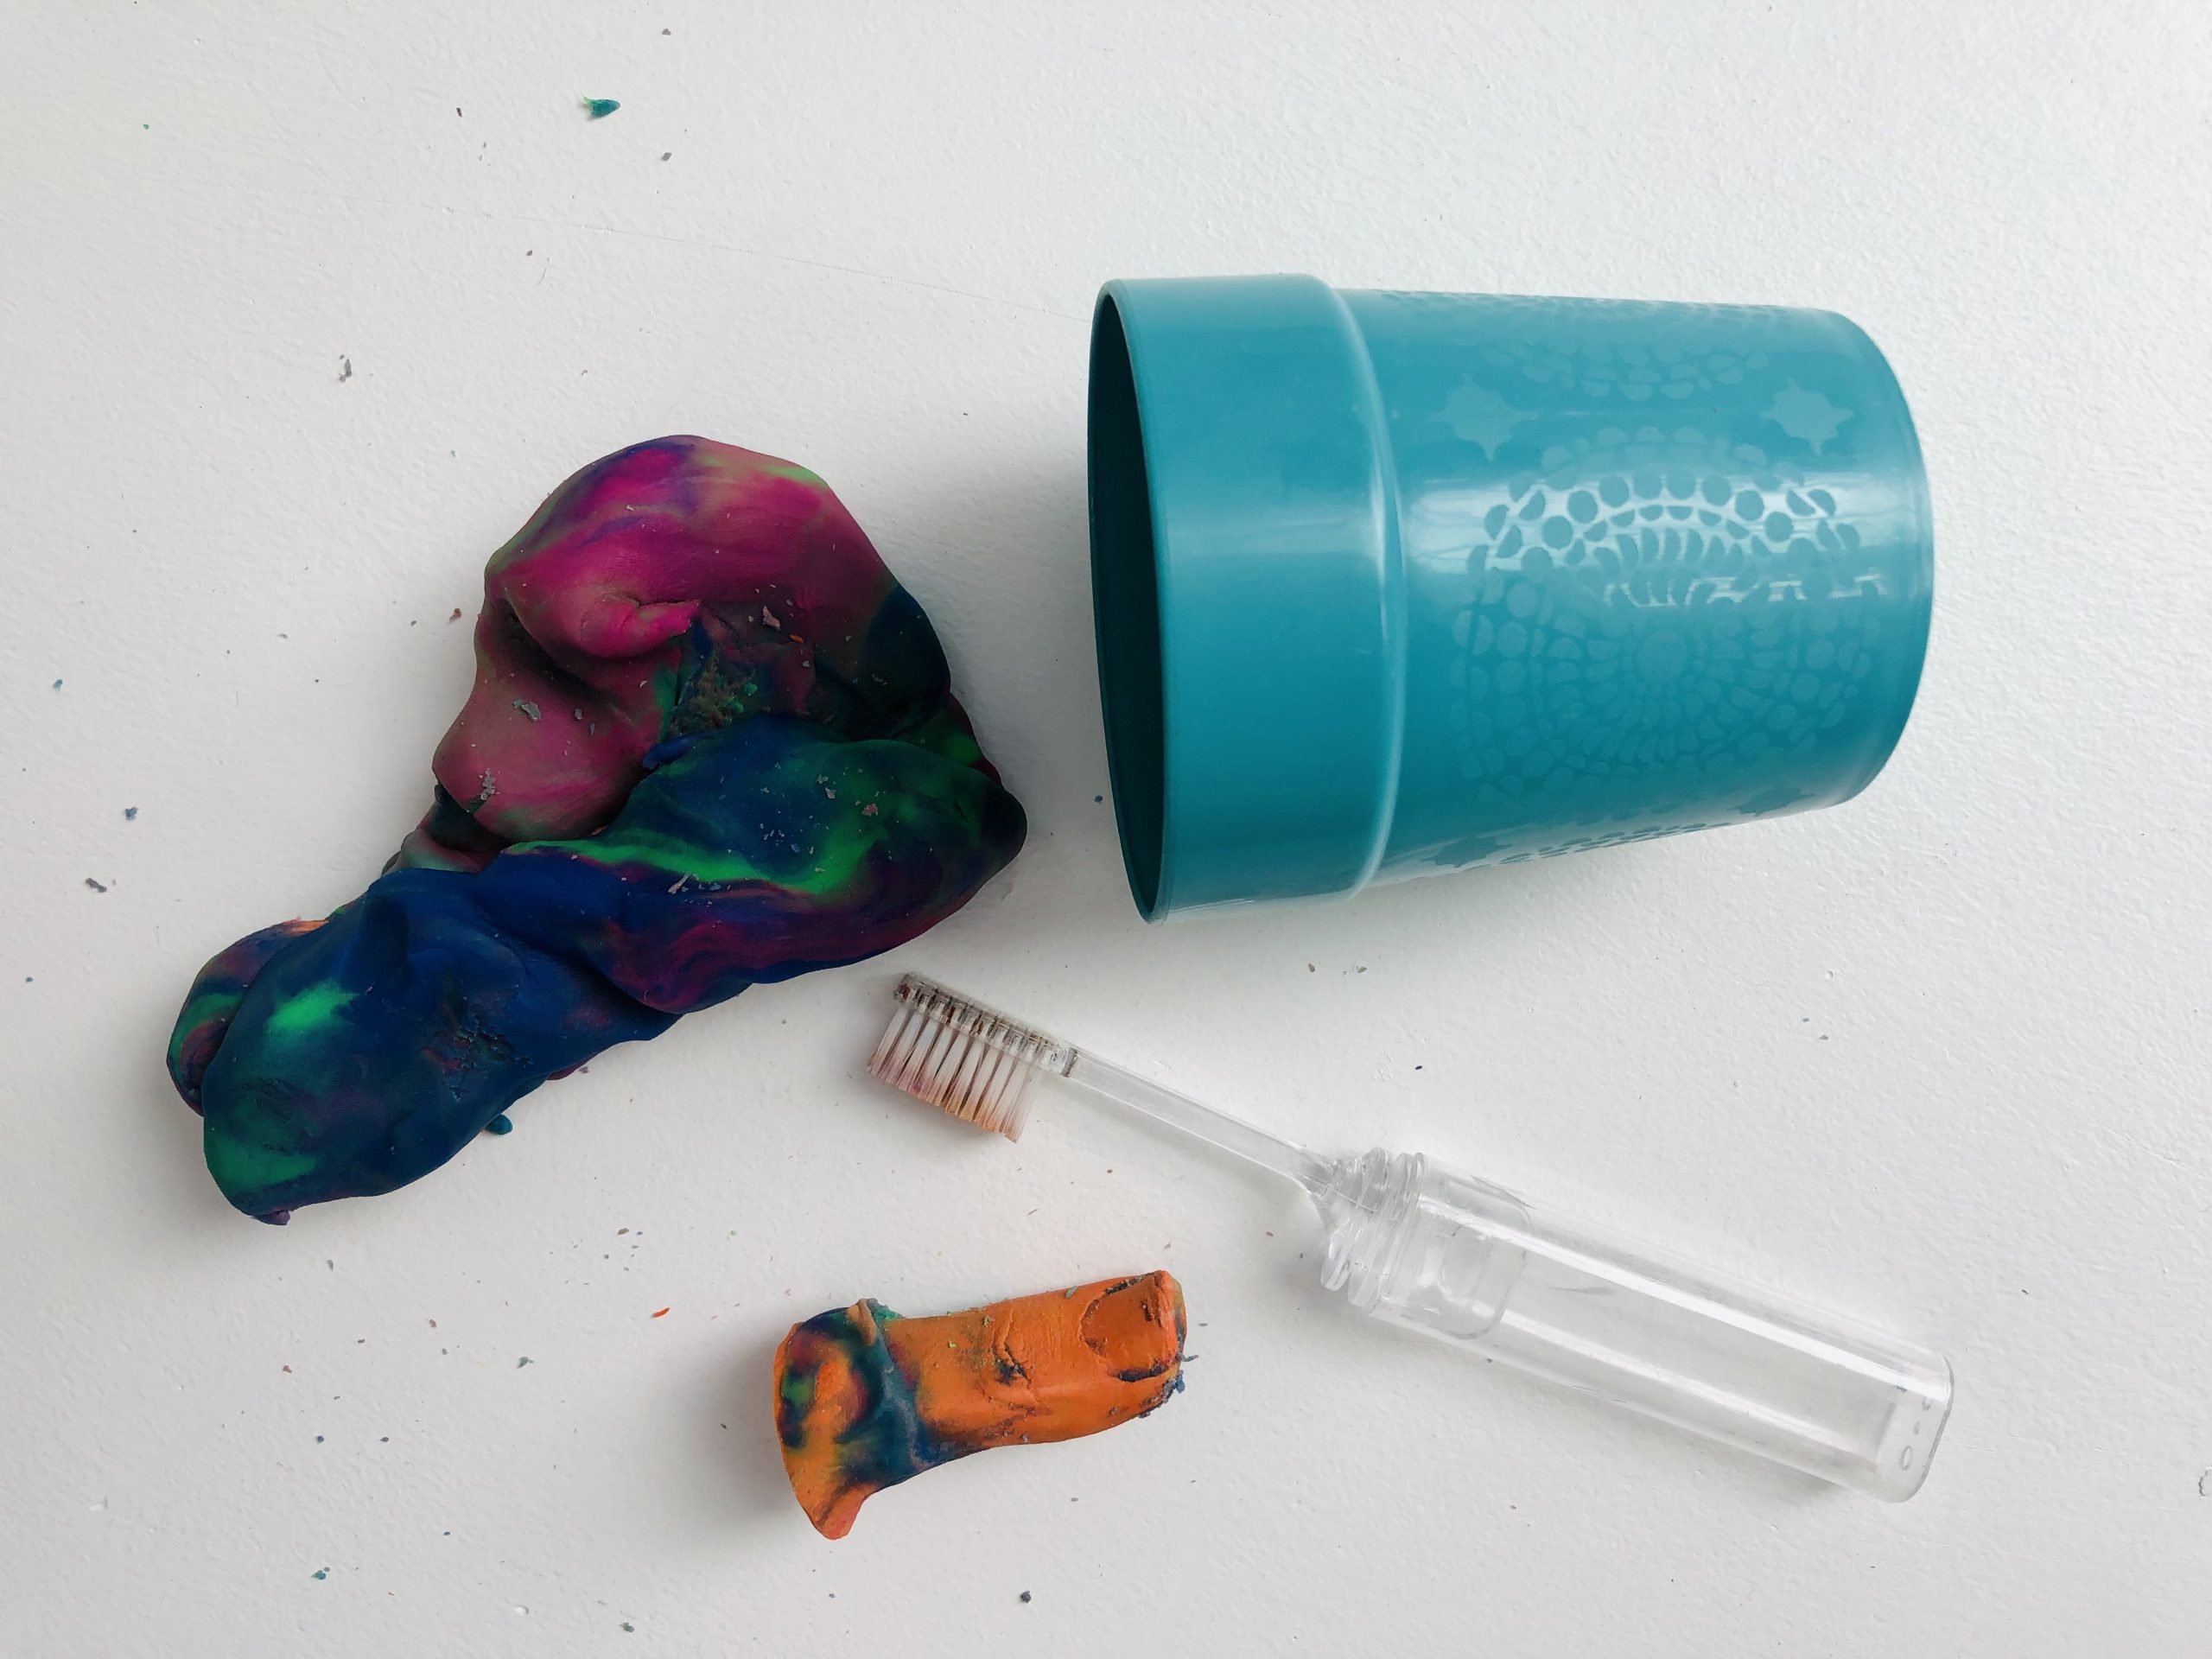
- Gather your materials. For this project, you will need unwrapped crayons, dough (if you don’t have colorful dough on hand, try our salt dough), a microwave-safe container (we recommend glass, but look for a microwave-safe symbol on the container you pick), a microwave, a tray or cup, and a variety of small objects to press into the dough. Tip: To remove the paper wrappers from crayons, place crayons in water for 2 to 3 minutes.

- Press and play. Grab your dough and small objects and experiment by squishing the objects into the dough. When you remove the object, what do you notice? You might see an empty space in the shape of the object left behind! Try pressing the object into the dough from different angles. What can you make?
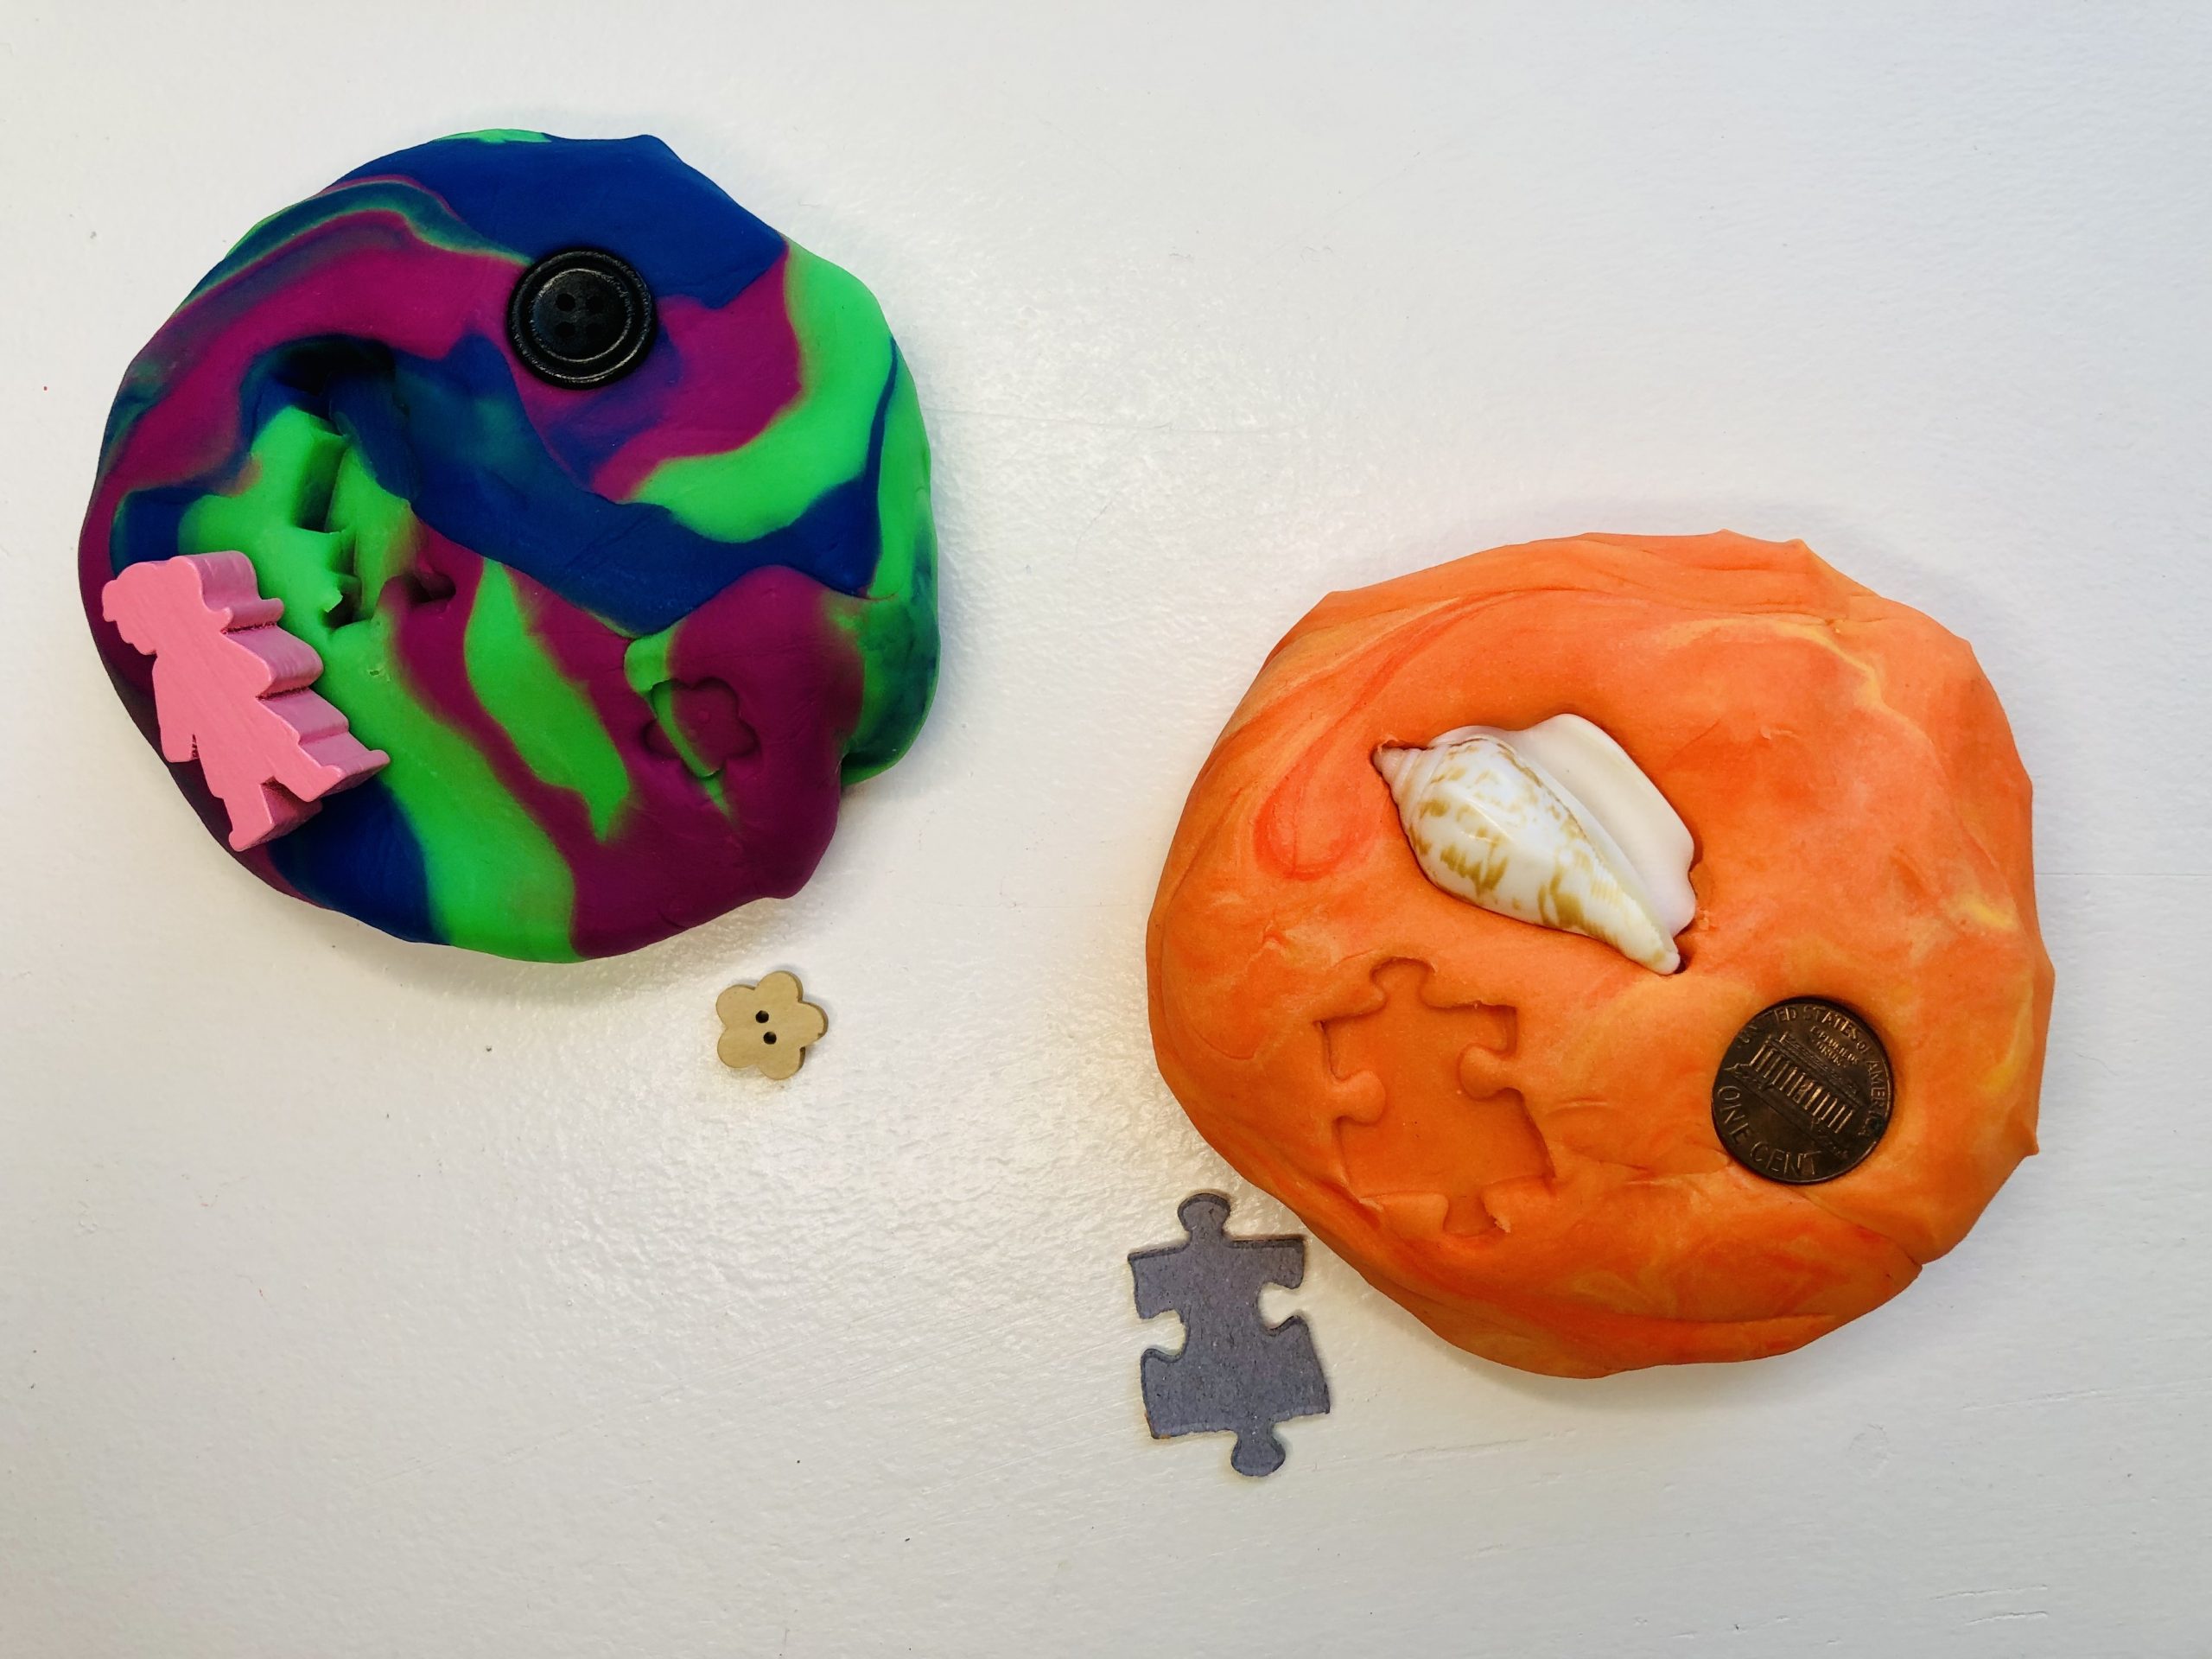
- Make a face! Place your dough in a tray and flatten it out. Using your fingers, pinch around the sides to give it edges like a bowl. Then, using small objects and your fingers, make a face in the dough! What will your facial expression look like in your self-portrait? What objects will you use to create your facial features? Remember that you are creating a mold, so the objects that you press into the dough will pop out in your completed self-portrait.

- Choose your colors. Which color would you choose to describe yourself? Would you choose your favorite color, a color that describes how you are feeling today, or something else? We recommend sticking to colors that are next to each other on the color wheel so you can make a bright and vibrant self-portrait. Break your chosen color(s) of crayon into small pieces, and place them in your microwave-safe container.

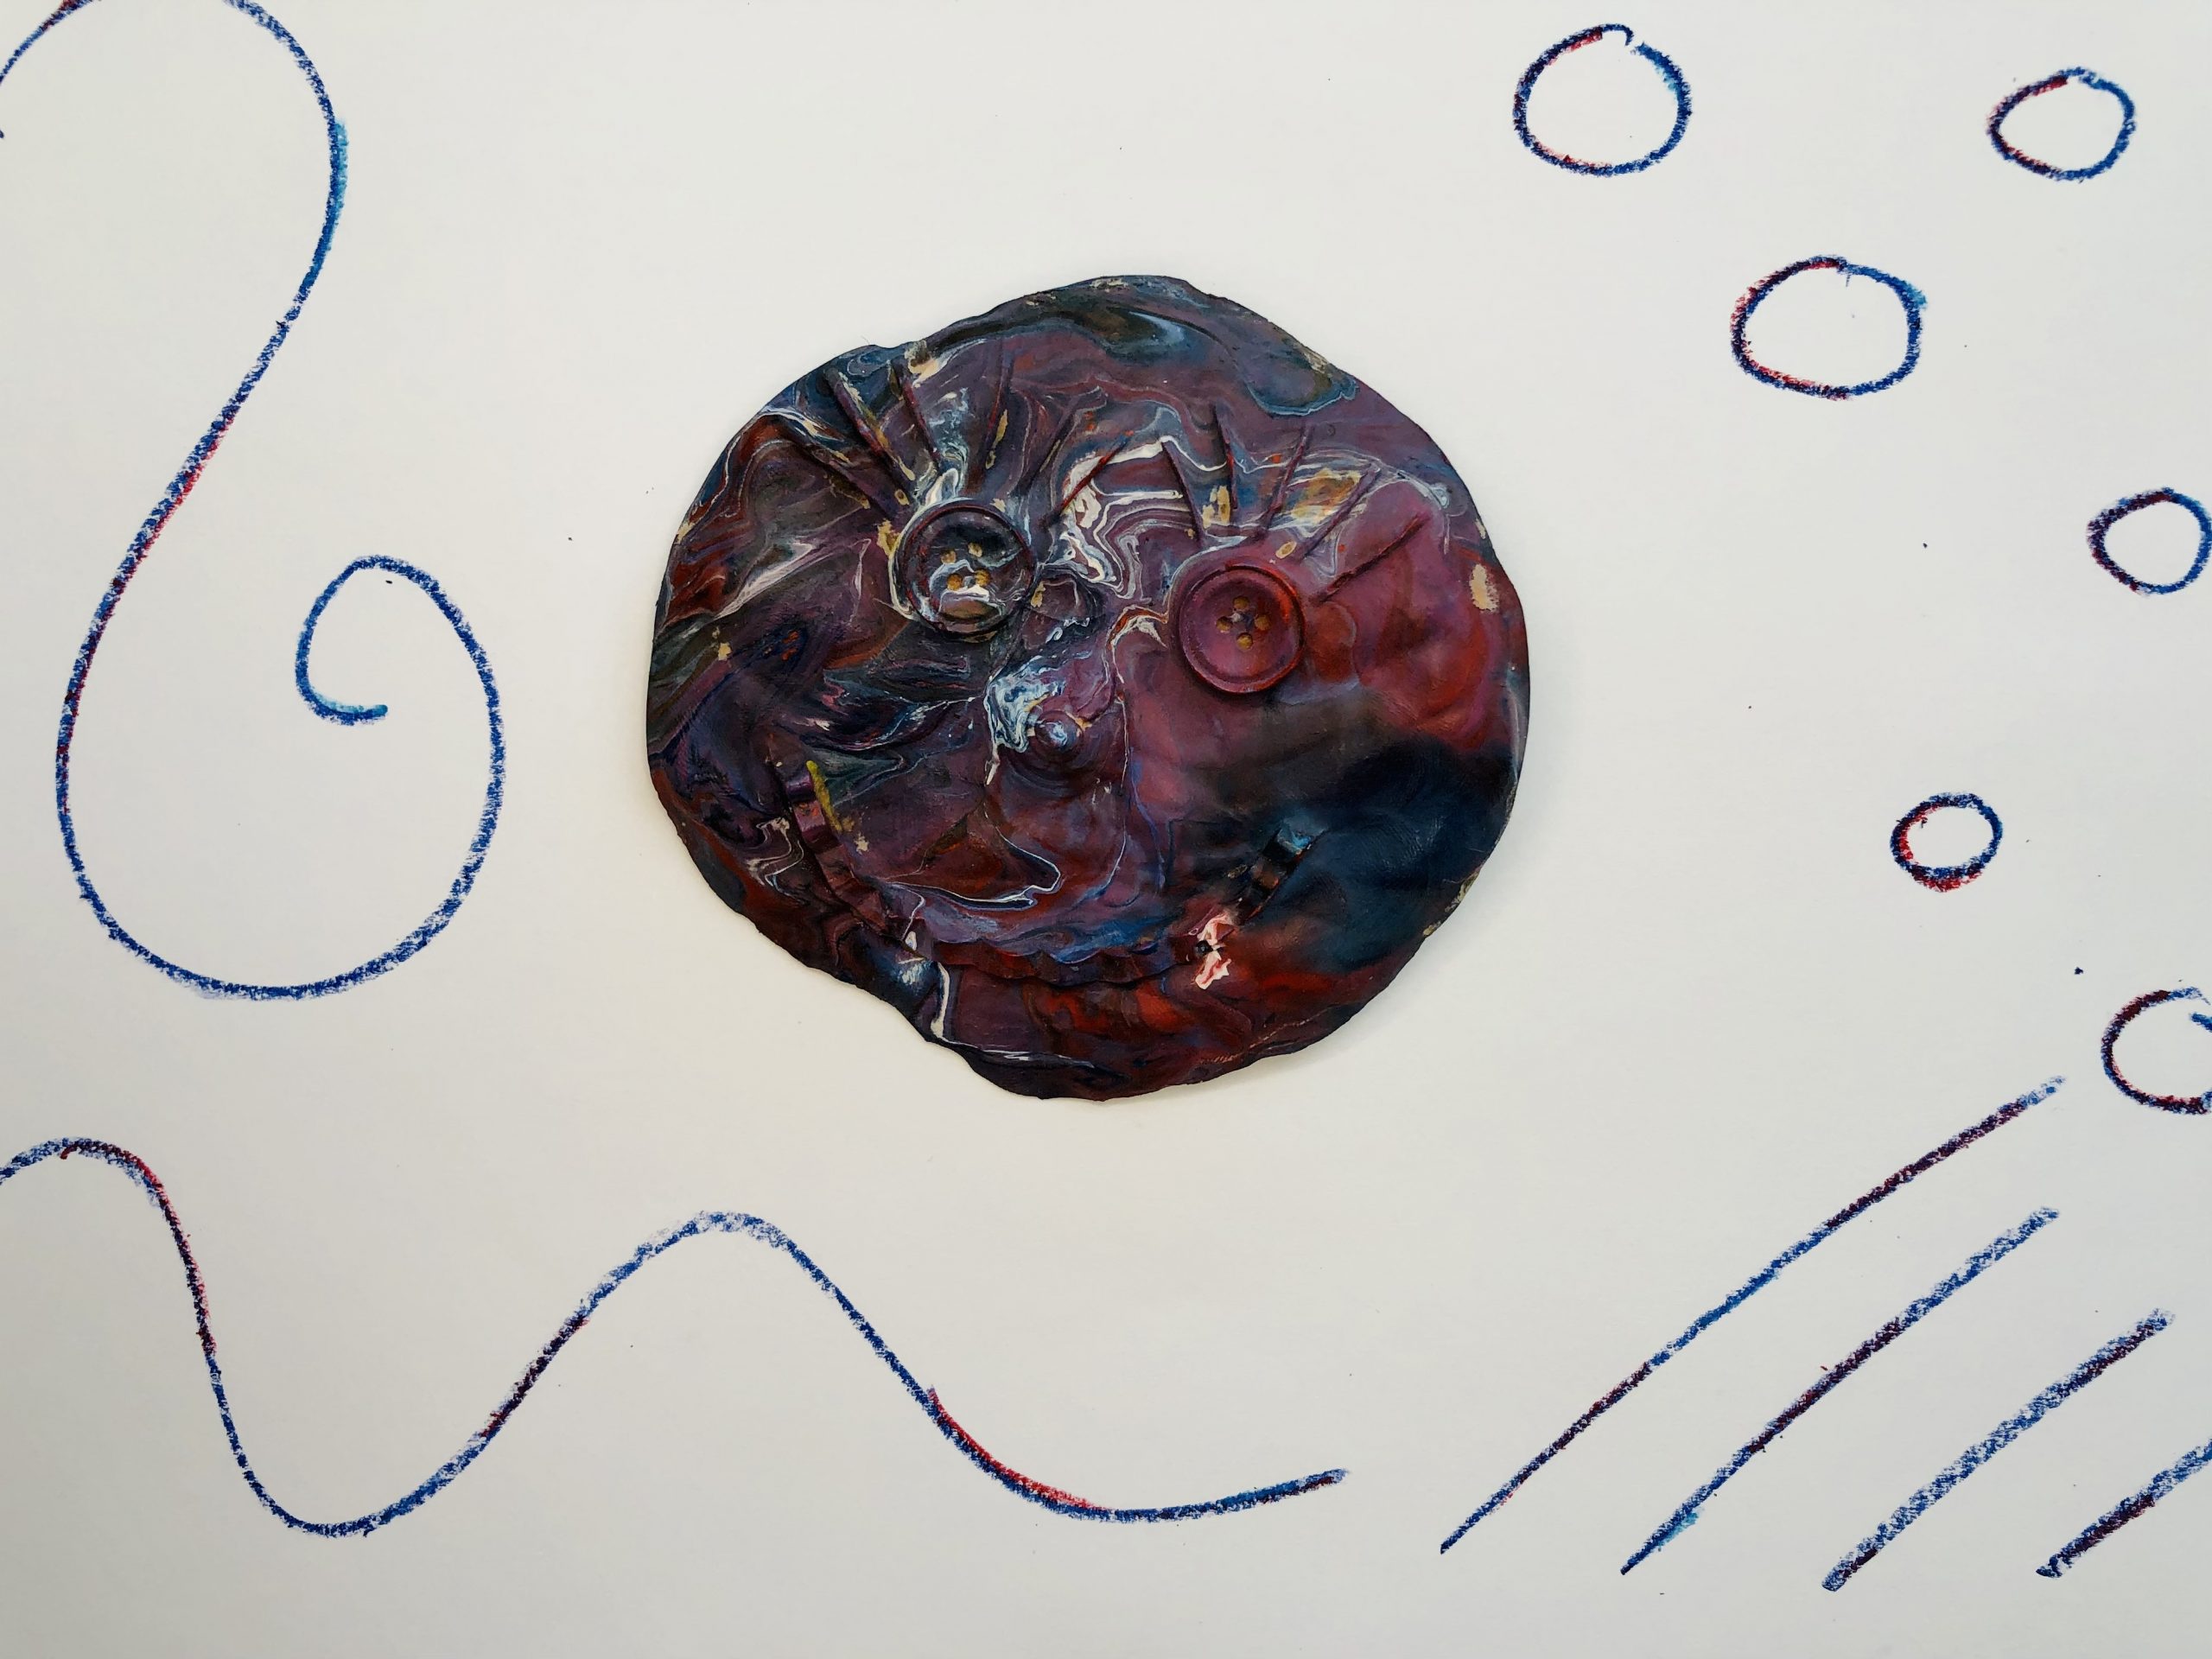
- Melt, pour, cool. You will need an adult’s help for this next step! Melt your crayons in the microwave, checking every minute until they’re completely melted. Note: A handful of crayons takes about 3 minutes to melt fully. Once the crayons are melted, carefully remove the container from the microwave and pour the melted crayons into your dough mold. Let cool for 10 minutes, and then you will have a big face-shaped crayon you can draw with!

- Clean it up. After your self-portrait has cooled, carefully remove the dough from the now hardened crayon. A brush may be helpful for removing dough in hard-to-get to areas. Like Antoni, you can also wash your casted self-portrait with water to remove the mold. Pick out any remaining small pieces of crayon, and your dough will be as good as new!

- Draw with your face. Now that your portrait is clean, you can draw with your face! Antoni changed the surface of her chocolate and soap self-portraits by licking and washing them. You can change the surface of your crayon self-portrait by using it to draw on a piece of paper! How do you notice the sculpture change as you draw with it?
- Title your self-portrait. Antoni titled her self-portraits Lick and Lather to describe the actions she’d performed to sculpt them. Will you pick a title that describes the actions you performed to shape your self-portrait, or something else?
We want to see your creations! Share on social media @hirshhorn with #HirshhornInsideOut.
MORE WAYS TO MAKE: Mold from your body!
- Press a part of your body into the dough. What part of your body will you mold? If you have a small amount of dough, we recommend rolling it into a ball and pressing your finger into it. Then carefully take your finger or body part out of the dough, and prop up the dough in a cup or tray.

- Melt, pour, cool.

- Clean it up.
- Draw with your body.

TEACHER TIPS
- Have students create their self-portrait molds on trays labeled with their names, and then bring them to an area of the classroom where the wax will be poured into the molds.
- Present 2 or 3 different colors of crayons for the class to choose among.
- Other ways to melt crayon wax for this project:
- Double boiler on a hot plate
- Wax melter (or crock pot)
- Place unwrapped crayons into a glue gun (tip: crayons should be as long as possible, with flat ends, for best results)