Futurist Flowers

Transform used cardboard materials into futuristic sculptures!
We want to see your creations! Share on social media @hirshhorn with #HirshhornInsideOut.
Time: 30–45 minutes
Skill Level: Intermediate
Topic: 2D to 3D transformation

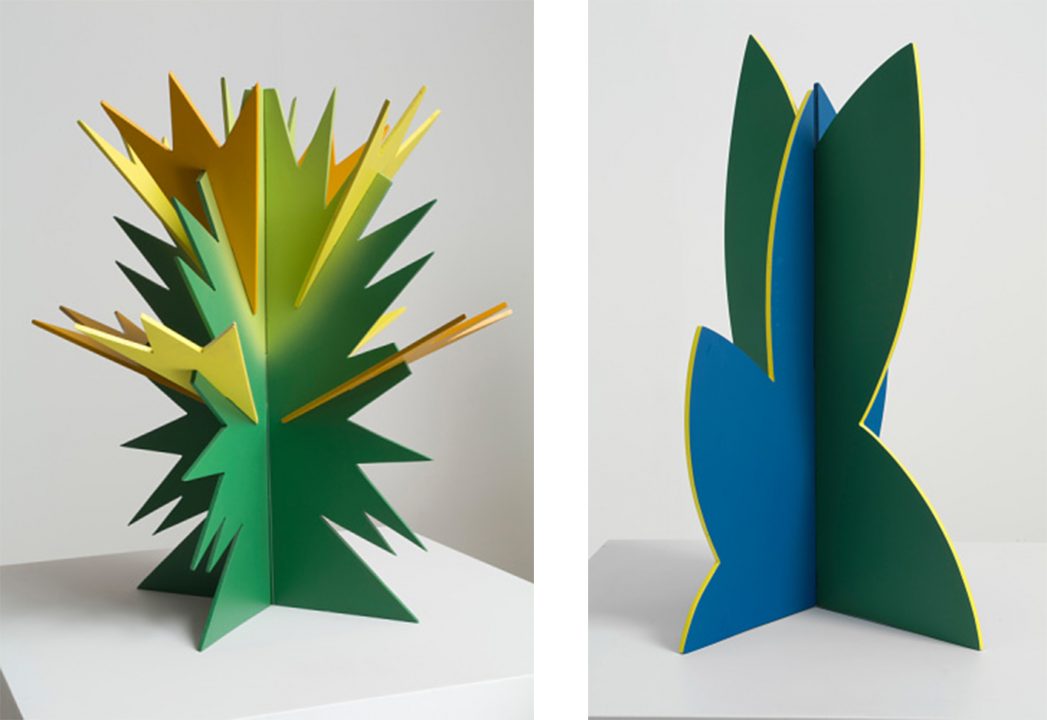
Giacomo Balla, Futurist Flowers, 1918–1925/reconstructed 1968. Courtesy of the Hirshhorn Museum and Sculpture Garden, Smithsonian Institution, Washington, DC, Joseph H. Hirshhorn Bequest, 1981
LOOK CLOSELY
Look at the two images. What do you see? Describe the colors and shapes. What do you think this is? What makes you say that?
These sculptures are by artist Giacomo Balla and are called Futurist Flowers. These works were made about 100 years ago and were the artist’s vision of the future. Have you ever seen a flower like this? How are these sculptures different from flowers you’ve seen?

Giacomo Balla, Archive of the 900, Museum of Modern and Contemporary Art of Trento and Rovereto
The artist Giacomo Balla (1871–1958) was a Futurist. After the turn of the 20th century, a group of artists wanted to move away from the past and incorporate aspects of fast-paced modern life and new technologies into their art. These artists were part of a movement called Futurism. What qualities make these flowers seem like they’re from the future? Balla created them about 100 years ago, and we are now living in his future. If you were to create futurist flowers based on your experience living now, what might they look like? What would make them seem that they’re from the future?
MAKE IT
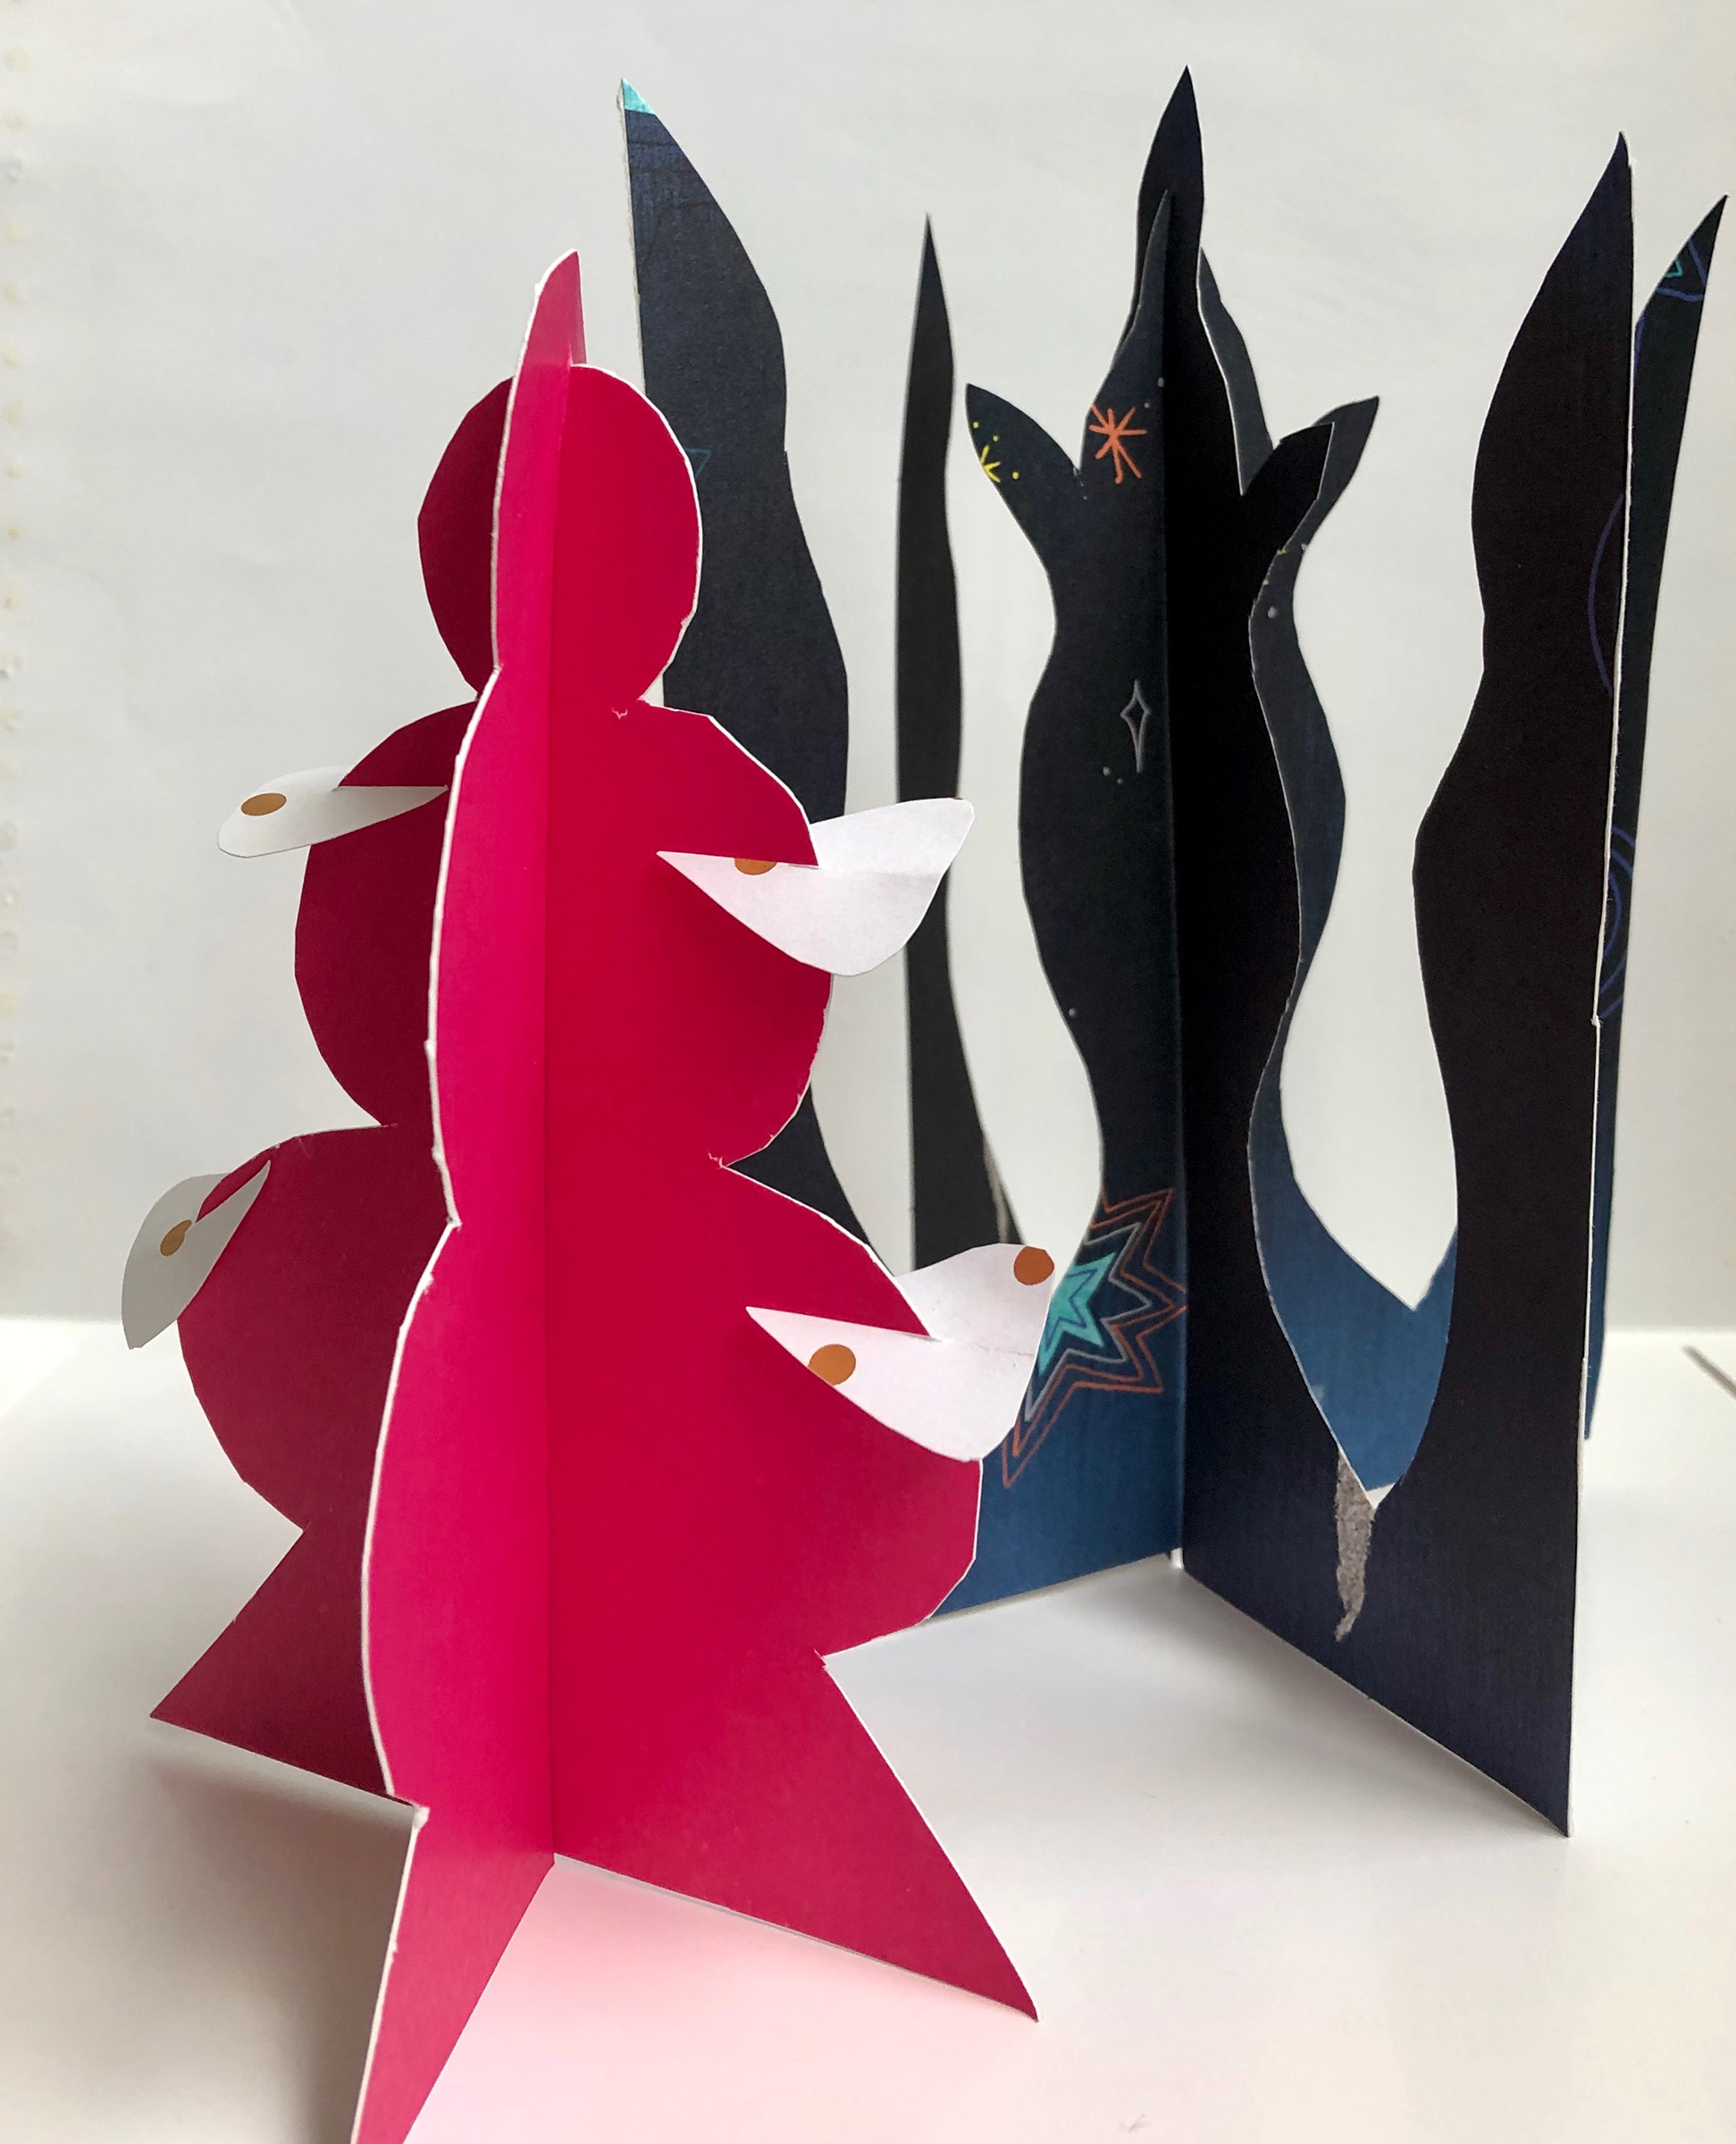
Giacomo Balla used wood and paint to make his Futurist Flowers. For this project, you’ll use scraps of cardboard and paper.

- Gather materials. Hunt through your recyclables for some colorful boxes, mail, old birthday cards, and magazines. Sturdy materials will work best. You’ll also need tape and scissors.
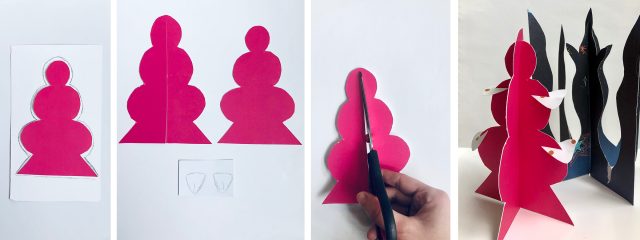
- Draw a flower shape. Cut it out.
- Trace the first flower shape. Cut out a slightly larger second flower shape.
- Cut a notch. Cut through the middle of the bigger flower shape from the bottom almost to the top.
- Fit your pieces together. Use the slit to fit your two flower shapes together to create your sculpture. Want to make a more elaborate flower? Cut and add petals!
- Secure your sculpture. Add tape where your two large flower shapes meet.